Hola a todos!!! Hiromi al habla =^^=
Hoy os traigo el ansiado tutorial de la Liga de la Justicia!!! =^^=
Ya avisé que quería hacerme estas uñas desde hacía tiempo pero no había podido y por fin he tenido tiempo!! Así que vengo a compartirlo aquí =^^=
¡¡Espero que lo intentéis y me contéis cómo os ha ido!!
Hi everybody!! This is Hiromi =^^=
I told you for a long time that i wanted to do this type of nails but i didn´t have a lot of free time, but i could do it!! The last weekend i could do it so now i want to show you how to do them and if you try them i wish you can show me too =^^=
I hope you like them!!
NAIL ART! JUSTICE LEAGUE
Advertencia!! **Estas uñas son de dificultad media-alta, sobretodo por los cambios de colores y los símbolos que requieren un poco más de maña y paciencia. Así pues recomiendo que hagáis las caritas en vuestra mano buena, pues son más sencillas de hacer con la mano torpe y los símbolos en la mano torpe con la mano con la que se os de mejor pintar =^^=
Advert! ** This nails are normal-difficult ones, because the lot of colours and the time you are going to use, so i recomend you to have patiente. And i recomend you to do the simbols with the good hand in the bad one and the faces with the bad hand in the good one because the faces are easier than the symbols.
PASO 1.
Pintamos las uñas de color carne para hacer los rostros de nuestros cinco elegidos de la Liga de la Justicia.
Darle un par de capas para que el color carne cubra bien vuestra uñas.
STEP 1.
Use the flesh colour to paint your nails, put two layers because the flesh colour isn´t so dark, so you can paint the faces better in them.

PASO DOS: COLORES
Además de los señalados en la foto de abajo vais a necesitar blanco y amarillo
STEP 2. COLOURS.
You will need the colours in the photos plus yellow and white.

Usar estos colores para hacer las bases en donde irán los símbolos de los super héroes
Use those colour to to the base for the symbols of our superheroes

PASO 3.
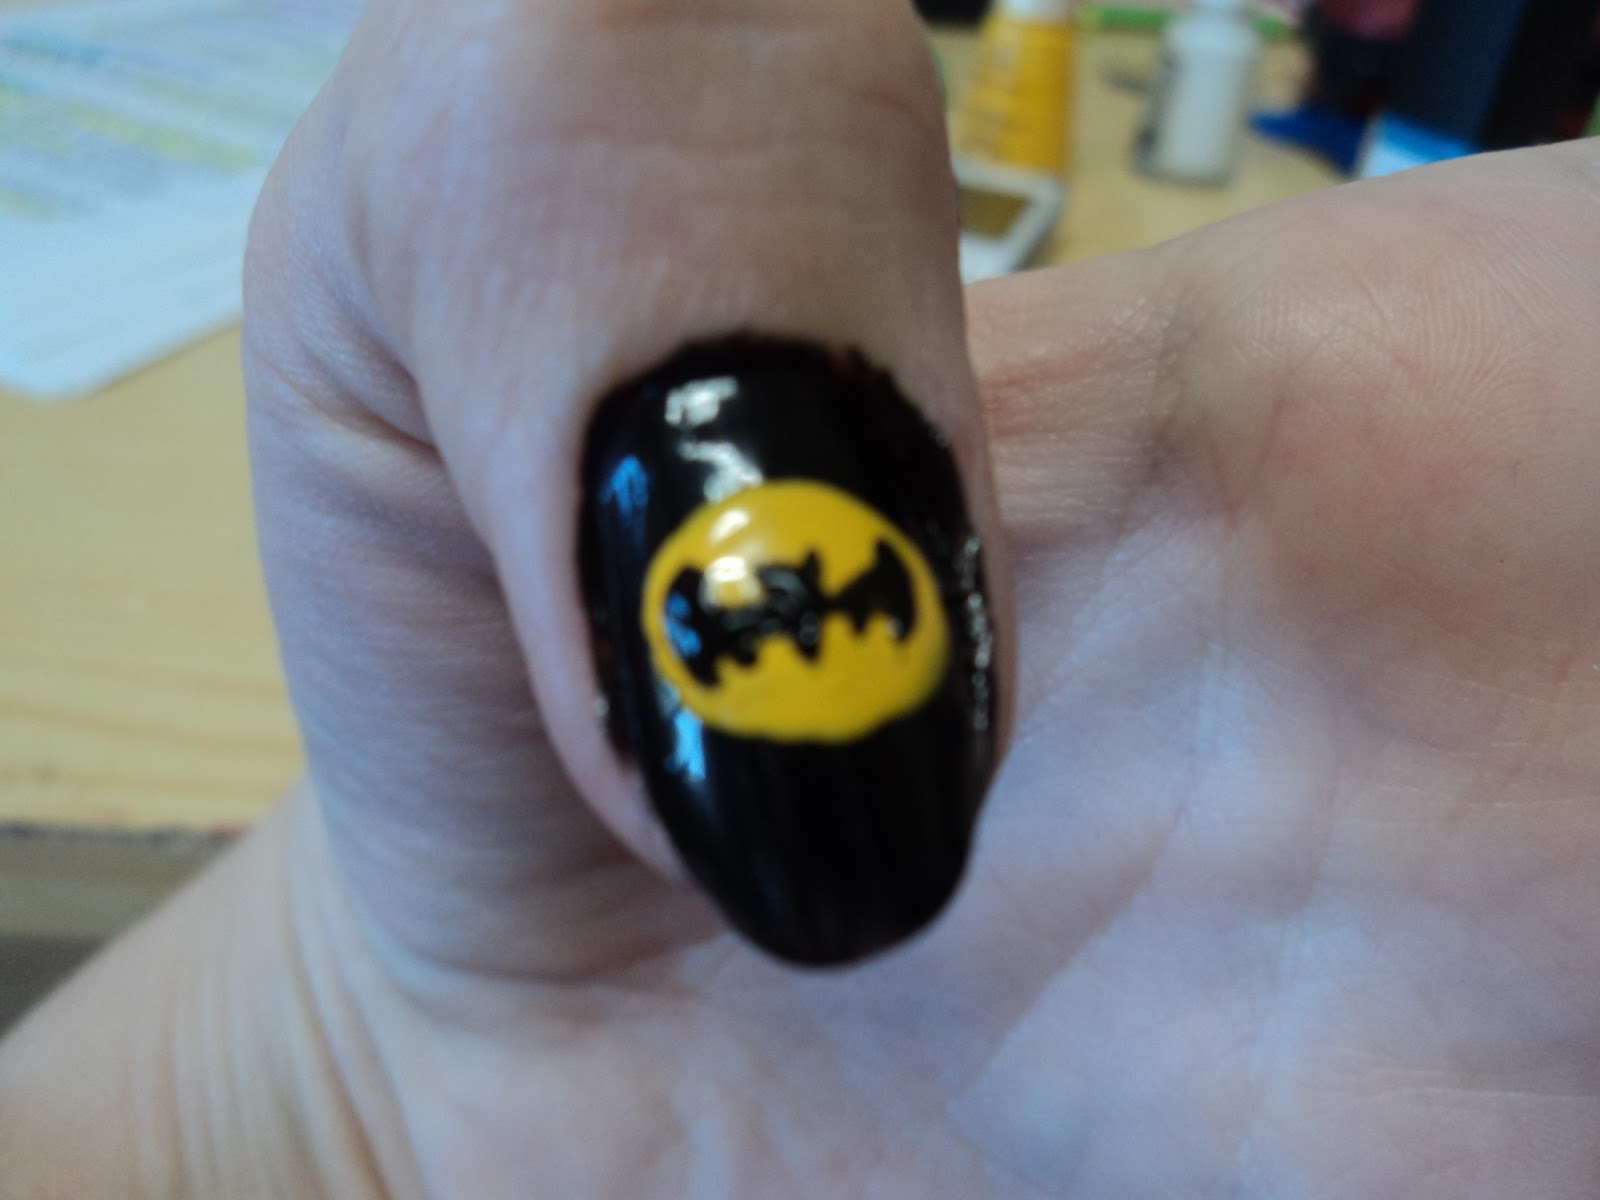
Usa el negro para hacer los cabellos de los superhéroes y la máscara de Batman, así como las bocas que quieras pintar.
Usa el rojo para hacer la capucha de Flash.
Para este paso os recomiendo que useis un pincel fino para pintar en las uñas. Los pinceles se pueden comprar fácilmente en los chinos, no hay pérdida.
El pincel os va a facilitar controlar la pintura para hacer las formas que queráis, además, aunque estés usándolo con la mano mala con paciencia no te salen malos resultados.
STEP 3
Use the black one to do the hairs of the superheroes and the Batman mask, and the mouths you want to paint too.
Use the red colour to do the Flash mask.
I recomend you to use a nail brush to do that, the nail brush is very easy to find in stores or in ebay and it is super useful to do this kind of draws in your nails and are easy to use too, so with patiente you can do them


PASO 4 Empezamos con los Símbolos.
Para hacer los símbolos, muchos de ellos además de estar sobre un fondo de un color están dentro de un círculo blanco, o alguna forma. Así pues es lo primero que haremos.
Primero, con la ayuda del marblelizador, que siempre usamos en los tutoriales, haremos dos círculos para los símbolos que estén en ellos.
Y con el pincel haremos el resto de símbolos, sin prisa, con tranquilidad.
STEP 4. Beggining with the symbols.
We will use to do the base of the symbols the marblelizing pen we usually use in all the nails arts i put here in my blog.
First we will do the circle with them and the other forms we will do them with the brush. Don´t worry and do them with calm, they aren´t as difficult as you can think in the beggining.


PASO 5. Vamos con las caritas!!
Hacer las caritas es MUY sencillo, sólo necesitas el lapiz marblelizador, mojado en su punta más pequeña en blanco o negro para hacer los ojos.
El antifaz de linterna verde lo haremos con el pincel, despacito y de lado a lado y veréis que bien os queda.
SPET 5. Lil faces!!
Like i show in other tutorials, use the marblelizing pen to do the eyes with the tiniest part, it is easy! You only hat to do dots with it!
The mask of Green lanters you have to do it with the brush, do it with calm and you can do it easyly too.


PASO 6. Símbolos.
Ahora viene la parte "complicada" y lo digo entre comillas porque como estamos haciendo los símbolos con nuestra mejor mano el pulso no debería temblarnos demasiado, y como además los símbolos no son muy complicados, sólo tenemos que tener la referencia delante para hacerlo.
Usar para ello el pincel.
STEP 6. Symbols.
Now you have to do the "difficult" part, i say that with "" because you are using the best hadn you have and the symbols aren´t so difficults in their forms, so take care, see the symbols in a reference and draw them with the brush


PASO 7. Detalles.
Ahora terminamos los ojos o lo que se nos haya quedado atrás mientras esperábamos que se nos secara la pintura, como la tiara de Wonder Woman o le ponemos la boca, que se me había olvidado a Flash, este estará contento, no como Batman que parece hastiado como si dijera "¿Qué hace un héroe oscuro como yo entre todos estos metecatos luminosos???" XDD
STEP 7. Details.
Now it is the time to do the things you couldn´t because of the wet paint, like the tiara of Wonder Woman or letting Flash to have a mouth haha i forgot that haha I put a quite shy smile, not like Batman, his face is so funny like he was thinking "Gosh, why i have to be with thos baddass?" hahahaha


PASO FINAL.
Como siempre aplicamos la capa final translúcida y adherente para un resultado final mejor =^^= Et voilá!!
LAST STEP.
We use the top shinny coat to have them finished!! =^^= Voilá!


Madre mía que trabajazo! X3
ResponderEliminarPero que genial resultado!! *_* gracias por compartiiiir!!
Es laborioso, pero queda muy chulo =^^= así que merece la pena jiji
EliminarMe quedo con tus uñas green lantern :)
ResponderEliminar=^^= si te las haces enseñalas ! =^^=
Eliminar