Cosmake 2012-2013. Working progress...
¡Bienvenido una vez más a "Cute and Dark Geeky Life" (C&DGL)! Les habla Hiromi en esta primera entrada en la que os vamos a mostrar el nuevo proyecto en el que Eaadim y yo nos hemos embarcado!!
¿Y de qué se trata?? ¡¡Pues ni más ni menos que el hacer los cosplays del Príncipe de Persia (traje del videojuego Prince of Persia 4) y de Pyrrha, la hija de Sophitia del Soul Calibur V!!
Welcome to "Cute and Dark Geeky Life" (C&DGL) one more time!!! This is Hiromi and today I´m gonna tell ya about the new proyect in which Eaadim and I are working!!
So... What´s up? We are working in the costumes of... Prince of Persia (the costume of the videogame Prince of Persia 4) and Pyrrha the daughter of Sophitia, Soul Calibur V!!!!


¿¿¿No son unas elecciones geniales??? Este año va a ser el primer año desde que Eaadim y yo comenzamos a hacer cosplay juntos en el que no vayamos de la misma temática, peeeero no pasa nada!! Por su parte irá con su encantadora hermanita (>////< kawaiiiii una mini-cosplayer!!! Ò.Ó estoy más cerca de conseguir mi grupo de cosplay soñado!!) y por mi parte espero este año contar con dos chicas estupentásticas (XD) que son "Viola" y "Dessyng", dos de mi readers más lindas =^^= ¡¡Chicas al poder!! Vamos a poner el evento patas arriba con nuestro carisma jajaja
Cool, aren´t they?? >///< This year will be the first one, since Eaadim and I began to do cosplay together, in which our characters don´t match each other because they aren´t in the same videogame (manga, anime...) buuuut that´s not bad! Eaadim will go with his lil and suuuuper cute sister like Elika (yayyyy a mini-cosplayer!! >////< so kawaiii!!! My dream will be true Ò.Ó I want mini-cosplayers near to me!! XD). And I´ll go with two of my favourites girl friends =^^= "Viola" and "Dessyng" who are my readers here too, of course. We will be the sensation in the event!!! hahaha
Debido a que una servidora es una opositora muy atareada hemos tenido que empezar este año a hacer el cosplay muy pronto, pues muchas veces yo apenas tengo un día a la semana y el salón, aunque parece estar lejos, no lo está, pues de por medio tenemos el Salón del Manga de Barcelona, las Navidades, San Valentín... y todas esas fiestas que nos gustan tanto y que nos gusta celebrarlas en condiciones sin tener que pensar que "vamos mal de tiempo"... Así pues hemos decido comenzar YA con los trajes.
I´m studing a hard competition exam (I don´t know if you know it) so I don´t have a lot of free time... For that reason we thought that we had to begin this cosplay very early, to do it with calm. You can think that if we have the event in March beggining now it´s too early, but you have to think that in the week i only have a day free and then you have to think that there are Christmass time, we want to go to the event of manga in Barcelona in November, Saint Valentines... those are dates and days that we want to do those things withouth think "Oh my... we are wasting our cosplay time..." So we thought to begin the cosplay THIS week.
Así pues comencemos con la narración de nuestro trabajo en su primer día!!!
So... now you can read how it was our first day of cosmake!!
DÍA 1: CREACIÓN DE LAS ARMAS DE PYRRHA.
DAY 1: PYRRHA´S WEAPONS
Primero vamos a enumerar los utensilios que usamos en este primer día:
*Espuma floral o Floricel
*Cúter
*Un tubo de aluminio de diámetro pequeño
*Cola blanca y pinceles.
¿Eso es todo? ¡¡Pues si!! Porque con la Espuma floral se pueden hacer cosas increíblemente complicadas de manera muy sencilla y con un resultado INCREÍBLE.
Una de las cosas que quiero mostrar en este blog es que no tienes que tener un taller en tu casa para poder hacer grandes cosplays o al menos con unos resultados más que interesantes, así que espero que la información que comparta con vosotros os sirva y os ayude a ver que todos podemos mejorar con un poco de maña, conocimiento e investigación y ganas!
First of all I´m going to say what kind of tools we used:
*Floricel.
*Cutters.
*Aluminium tube (lil diámetre)
*White glue
That´s all?? YES, do you know what?? Because Floricel is an amazing tool, easy to find and more easy to use!!
With this blog I want to show you that you can do good cosplay without spend a lot of money or withouth have your own workshop in your house. You only have to have a lil of skills, knowledge and will!!

Aquí pues ver algunos de los materiales recién comprados en mi cuarto lleno de cómics y de peluches XD
Here you can see the materials in my study room full of comics and plushes XD
Lo primero que hicimos fue coger las planchas de espuma floral que las compramos en un chino, sin ir más lejos y que nos salieron muy baratas, creo que fueron 3 euros la plancha y comenzamos a dibujar la espada y el escudo en ellas.
Puedes hacer un patrón antes en un papel para que te salga más fiable pero Eaadim y yo tenemos mucha maña y sabemos dibujar, así que lo hicimos "tal cual" y como veis nos salió a la primera XD (Es lo que tiene la experiencia XDD)
First of all we used the floricel (we bought them in a chinease´s chop very cheap, more less 3 euros per one) and then we began to draw the form of the weapons there.
Eaadim and I usually draw so we didn´t use a pattern, but you can do it if you are not sure if you can do it at the first time. We did it a lot of times in the past so we can do it like that XD

Aquí Eaadim dibujando sobre el Floricel a "ojo" (es que el tiene muy buena vista, no como yo que soy miope XD vale, chiste malo XDD)
Here you can see Eaadim drawing the weapon in the style freehand map (If i say it worng please correct me I don´t know about somes specifics words)


En la foto de abajo se ve como medimos si la medida es la que deseábamos, la de una rodela, y si, va bien =^^=
The shield, we did it a lil more little than we wanted because in the next day we will do a base of wood so we can do easily the hook fo the shield for my arm.

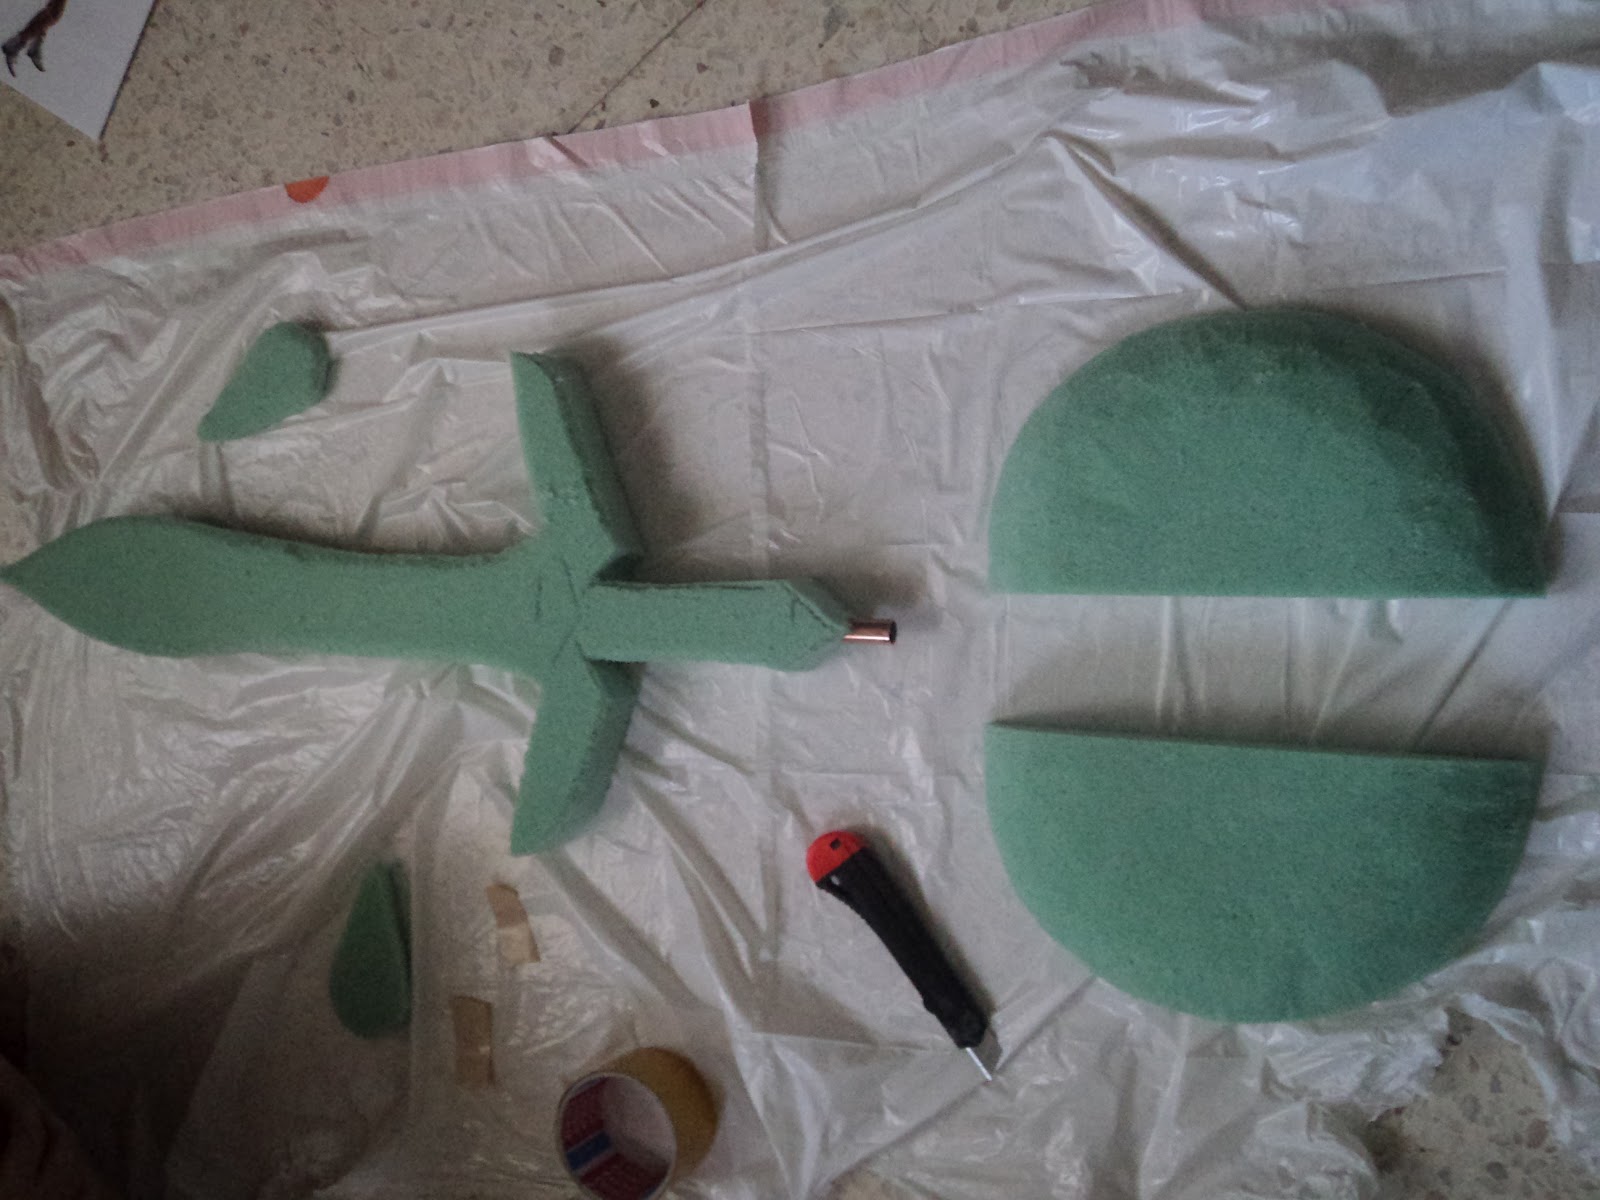
Antes de comenzar a cortar, introducimos en la espuma, con movimientos circulares y con cuidado de no partirlo, en la espada, el tubo de aluminio. ¿Por qué? Pues para darle un esqueleto más rígido y asegurarnos de su estabilidad. Podría ser cualquier tubo o palo, pero nosotros teníamos eso por ahí así que lo usamos.
Y ya luego comenzó el trabajo de recortar la espuma con cúter y de darle forma. La espuma floras es increíblemente fácil de cortar y de manejar así que es un trabajo de talla muy agradecido y muy divertido, pero tener cuidado que es fácil cortar demasiado!! ^o^ Es un Hiromi-consejo
The we inserted the aluminium tube in the floricel of the sword. Why? ´cause we wanted a stronger skeleton for the sword. You can use whatever you want but we had the aluminium tube so we use that.
And we began to cut the floricel with the cutters tryng to do the perfect form. You have to think that altought Floricel is a material super easy to cut and to use you have to take care of the form of the weapons, it´s too easy to cut so you can do a mistake!! ^o^ Hiromi-advice

This pic is for my feets fans of Deviantart wtf?? XDD


No sólo hay que cortar las piezas sino que añadimos relieves tal y como aparecen en las armas, y recordar que hay que tallar las piezas para darle las formas adecuadas como veis en las fotos de abajo, con un especial énfasis en los detalles que luego se pegarán.
You have to sculp the pieces, not only to cut them, and we did the part of the weapons which are in differents reliefs too.

La espuma floral tiene una superficie porosa que debe ser endurecida, para ello usamos cola blanca, con dicha cola también puedes pegar los relieves unos con otros, es muy cómodo.
Recordar que hay que darle varias capas de cola blanca, sin aguar, para que coja algo de consistencia y no sea tan blanco, al menos dos.
Tarda en secar pero una vez seco se vuelve duro y resistente y ya estaría listo para pasar a la fase siguiente!
The Floricel has porous surface and you have to do it stronger, so we used the white glue, withouth water, for that. And thanks to the white glue you can do that the reliefs stick together =^^=
You have to put white glue at least two times.
When all is dry and stronger the pieces are ready to the next stage!!


El secado necesita bastantes horas, así que tener paciencia y tener en cuenta que tendréis que hacerlo en días separados seguramente.
You have to wait till it´s dry, so don´t worry if it´s take because the white glue in this porose surface takes their time XD

Con este último paso hemos completado la fase 1!!! Y ahora estamos listo para darle una mayor dureza, incluso, hacerlo uniforme y dejarlo listo para pintar!!
Peeeeeeeeeeero eso será la próxima semana! Iremos contando el proceso en cada etapa tal cual lo vayamos haciendo!! =^^=
Esperamos que os haya gustado esta entrada y que os pueda servir, y sobretodo comentar si tenéis dudas, que encantados os las responderemos!!!
Nos leemos pronto!!!
And with this the stage 1 is complete! Now we are ready to began with the next stages buuuut that´ll be when we ´ll do so we can tell ya with our own experience! =^^=
We´ll wait that you like this entry and you can use this information if you are doing cosplay, and if you have any question, please ask us, we are here to help you too =^^=
Read you soon!!
No hay comentarios:
Publicar un comentario